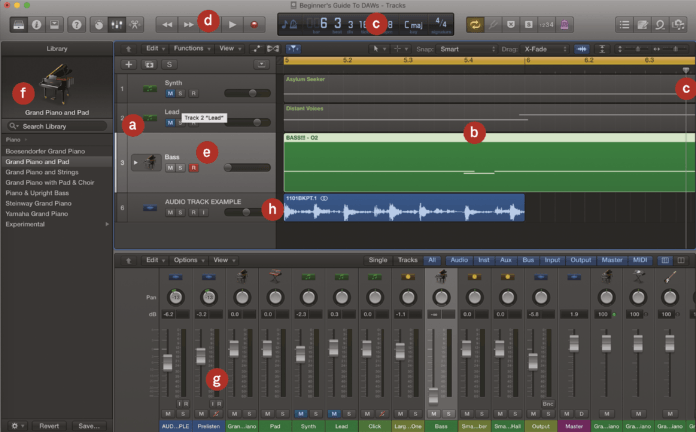
A. Tracks – Your song comes together track by track. In this case, we’re showing four different tracks labelled Synth, Lead, Bass, and Audio
B. The song – This is shown in the main arrangement window, where you can see the information – notes, etc – as data that corresponds to the tracks on the left
C. Timings and bars – As this song plays, it moves from left to right (indicated by the pointer). The window at the top shows your song position in bars, or minutes and seconds
D. Transport controls – You can move the song pointer (C) by pressing various transport controls for play, record, rewind or fast-forward
E. Instrument track – You have either instrument tracks or audio tracks. In this particular project, Logic is triggering one of its own onboard piano emulations
F. Instrument – This instrument comes from Logic’s own library, which is listed on the left of the screen. You can load in instruments here, or via the mixer
G. The mixer – And here is the mixer. Virtual faders allow you to adjust the volume levels of each track, by clicking and dragging them up or down with your mouse
H. Audio track – The other type of track is an audio track and the audio information is shown as a graphical wave (white on blue representing sound waves of varying volumes)